
Called, naturally enough, the Delta Fit Kit, it consists of two pieces of plastic, some fasteners and pads. And instructions. Instructions are always good.
Before:

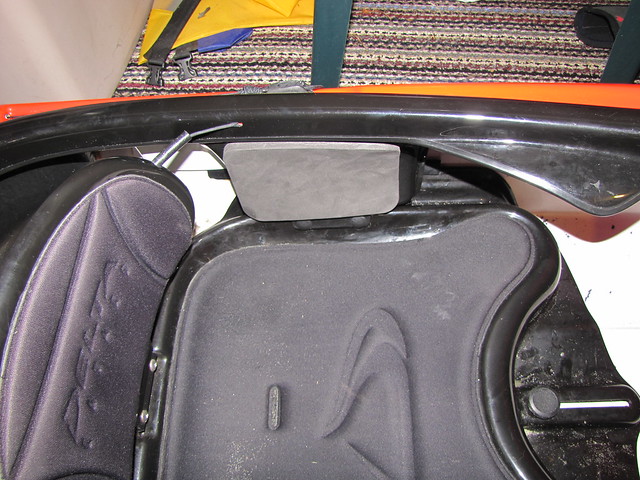
The cockpit of Louise's boat. You can see the white space between the seat and the underside of the coaming. This is, of course, the inside hull of the kayak. The plastic pieces of the Fit Kit attach to the seat and fit in on the underside of the coaming. When it's done, there should be a smaller inner wall of black plastic in front of the white hull.
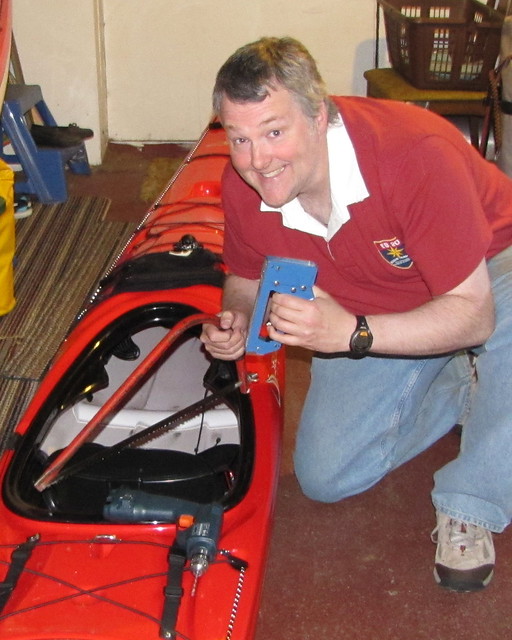
Of course, you shouldn't begin any job without having the proper tools ready to go. And nothing says "Let's work on a thin plastic kayak" more than a staple gun, drill and a rusty hack saw. Except for maybe a crowbar, sander and a welding torch. Bandages, a first aid book, a cell phone preprogrammed to call 9-1-1, and having the nearest trauma centre programmed as a waypoint into your GPS wouldn't hurt either
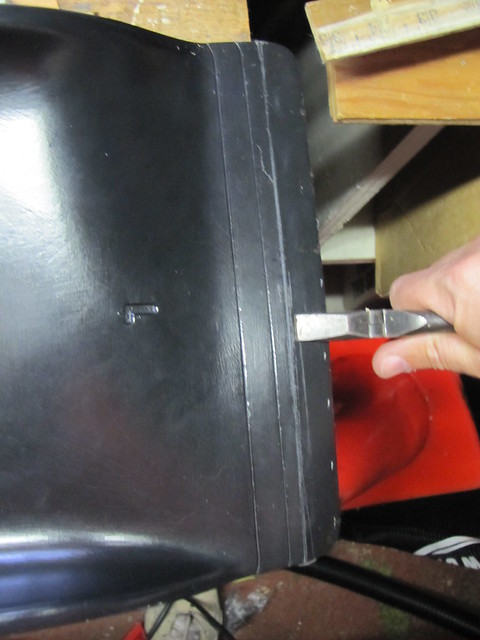
The first order of business is to trim your plastic pieces. Fortunately the instructions let you know just how much plastic to trim off for your particular kayak model. A little scoring with a box cutter...

...and a little bending with pliers and we're done.
Now comes the fun part: drilling!
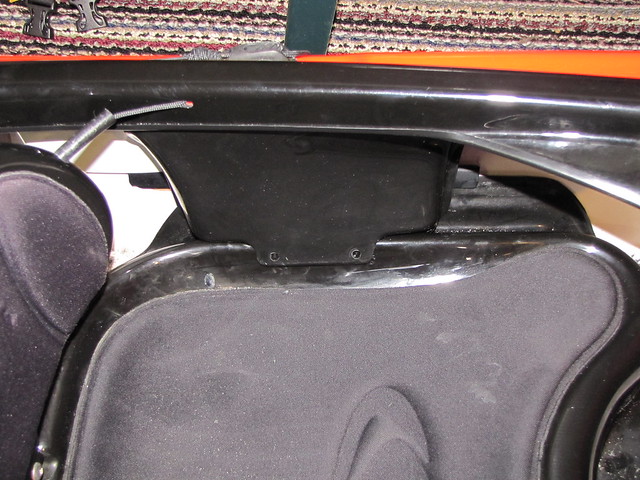
The new side pieces fit in tight under the coaming and snap onto the edge of the seat. Both the salesperson and the instructions warned that it might take a significant amount of force to make this work, but surprisingly not all that much was required.
With the pieces in place, they need to be attached to the seat, so holes must be drilled for the fasteners.
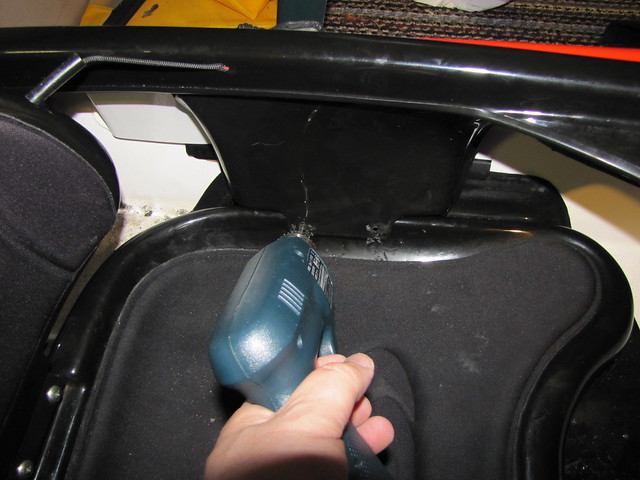
And if you haven't had any adrenalin rushes lately, may I recommend using a drill pointing towards the bottom of a plastic boat's hull! It does get the juices flowing!
And here we are with the plastic sides installed with the fasteners about to go in. They just push in very easily.
Louise hopped in and we tried to figure just how much padding she requires. The Kit comes with six pads, three for each side. We slid them in there for a test fit and two on each side seemed to be the magic number.
But we decicded for the moment to try only one on each side and see how it went on her next paddle.
A good post this one - anything that adds to paddling comfort results in more time on the water.
ReplyDeleteHilarious post, thanks for that :) I found it after googling 'Delta kayak hip' because I have the same issue on my Sport 17, not quite enough contact there (and I'm 6', 190 lb.)
ReplyDeleteAnyway, I'll order up a kit and break out the torch and crowbar.
Cheers,
Brent
Thanks, Brent. Stay tuned for my next "how to" article, How To Install A Skeg Using Only A Pocket Knife And A Pound of C-4. Should be a blast to read! :)
ReplyDeleteGood thing I already have a skeg then! :)
ReplyDeleteBy the way John, I did install the hip kit on my Delta 17 last week, and it was well worth it. The boat just hums along now, none of that worrisome 'ka-thunk' stuff as my butt slides over during a hard edge any more :)
ReplyDeleteGood to hear, Brent! Anything that stops your butt going ka-thunk is a good thing. :)
ReplyDeleteHappy paddling!
Nice post, good instructions. I installed mine last week with vice grips and a squeegie!
ReplyDelete